2020.03.12
1. 참고 문서
- https://v1-0-branch.kubeflow.org/docs/notebooks/setup/
2. Notebook server 생성
a. Cloud shell 기동

b. URL 확인
$ kubectl -n istio-system get ingress
NAME            HOSTS                                                 ADDRESS          PORTS   AGE
envoy-ingress   my-kubeflow.endpoints.my-kubeflow-269301.cloud.goog   34.107.211.135   80      6m42s$
$
c. Kubeflow 접속 (URL: my-kubeflow.endpoints.my-kubeflow-269301.cloud.goog)

d. Create a Jupyter notebook server and add a notebook
- Notebook Servers >> NEW SERVER 메뉴 선택
- 필드 입력
✓ Name:
입력한 Name 기반으로 Workspace Volume name은 “workspace-<Name>”로 설정되며, Name에 대문자가 포함된 경우 생성 시점에 에러가 발생됨
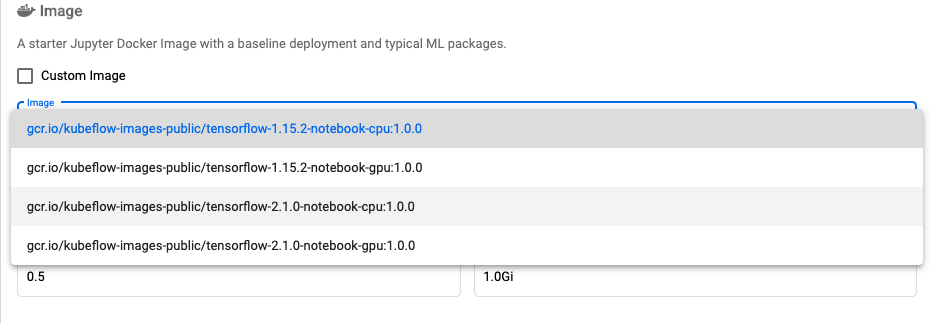
✓ Image: The image names indicate the following choices.
A TensorFlow version (for example, tensorflow-1.15.2) & CPU/GPU
If you choose a GPU image, make sure that you have GPUs available in your Kubeflow cluster.

✓ Workspace Volume:
Kubeflow provisions a Kubernetes persistent volume (PV) for your workspace volume. The PV ensures that you can retain data even if you destroy your notebook server.
PVC 확인하기 (GCP > kubernetes Engine > 저장소

- LAUNCH 버튼 클릭
GPU 타입의 Notebook server를 선택한 경우는 Kubernetes에 GPU Pool의 리소스가 없는 상태에서 CPU 타입으로 생성 됨
3. Experiment with your notebook
a. 생성한 Notebook Server 선택

b. Python3 Notebook 생성

c. Notebook 사용하기

'Kubeflow > 기능 탐방 (Kubeflow 1.0)' 카테고리의 다른 글
| Kubeflow 1.0 기능 #6 (Metadata) (0) | 2021.09.25 |
|---|---|
| Kubeflow 1.0 기능 #5 (KFServing, TFServing) (0) | 2021.09.25 |
| Kubeflow 1.0 기능 #4 (PyTorch Training) (0) | 2021.09.25 |
| Kubeflow 1.0 기능 #3 (Katib) (0) | 2021.09.25 |
| Kubeflow 1.0 기능 #2 (TF-Job, TF-Serving, Kubeflow pipeline) (0) | 2021.09.24 |


댓글